Never tried spinning, but you’re interested? Read on! This article is a short overview of the handspinning process. If you want to know how to spin a skein of woolen yarn, you’ll get the basic idea here.
STEP 1. RAISING AND SHEARING SHEEP
Don’t worry! This step can be left to the professionals, and you can buy your wool already clean and ready to go! Check my page Links You’ll Like to find fiber sources online.
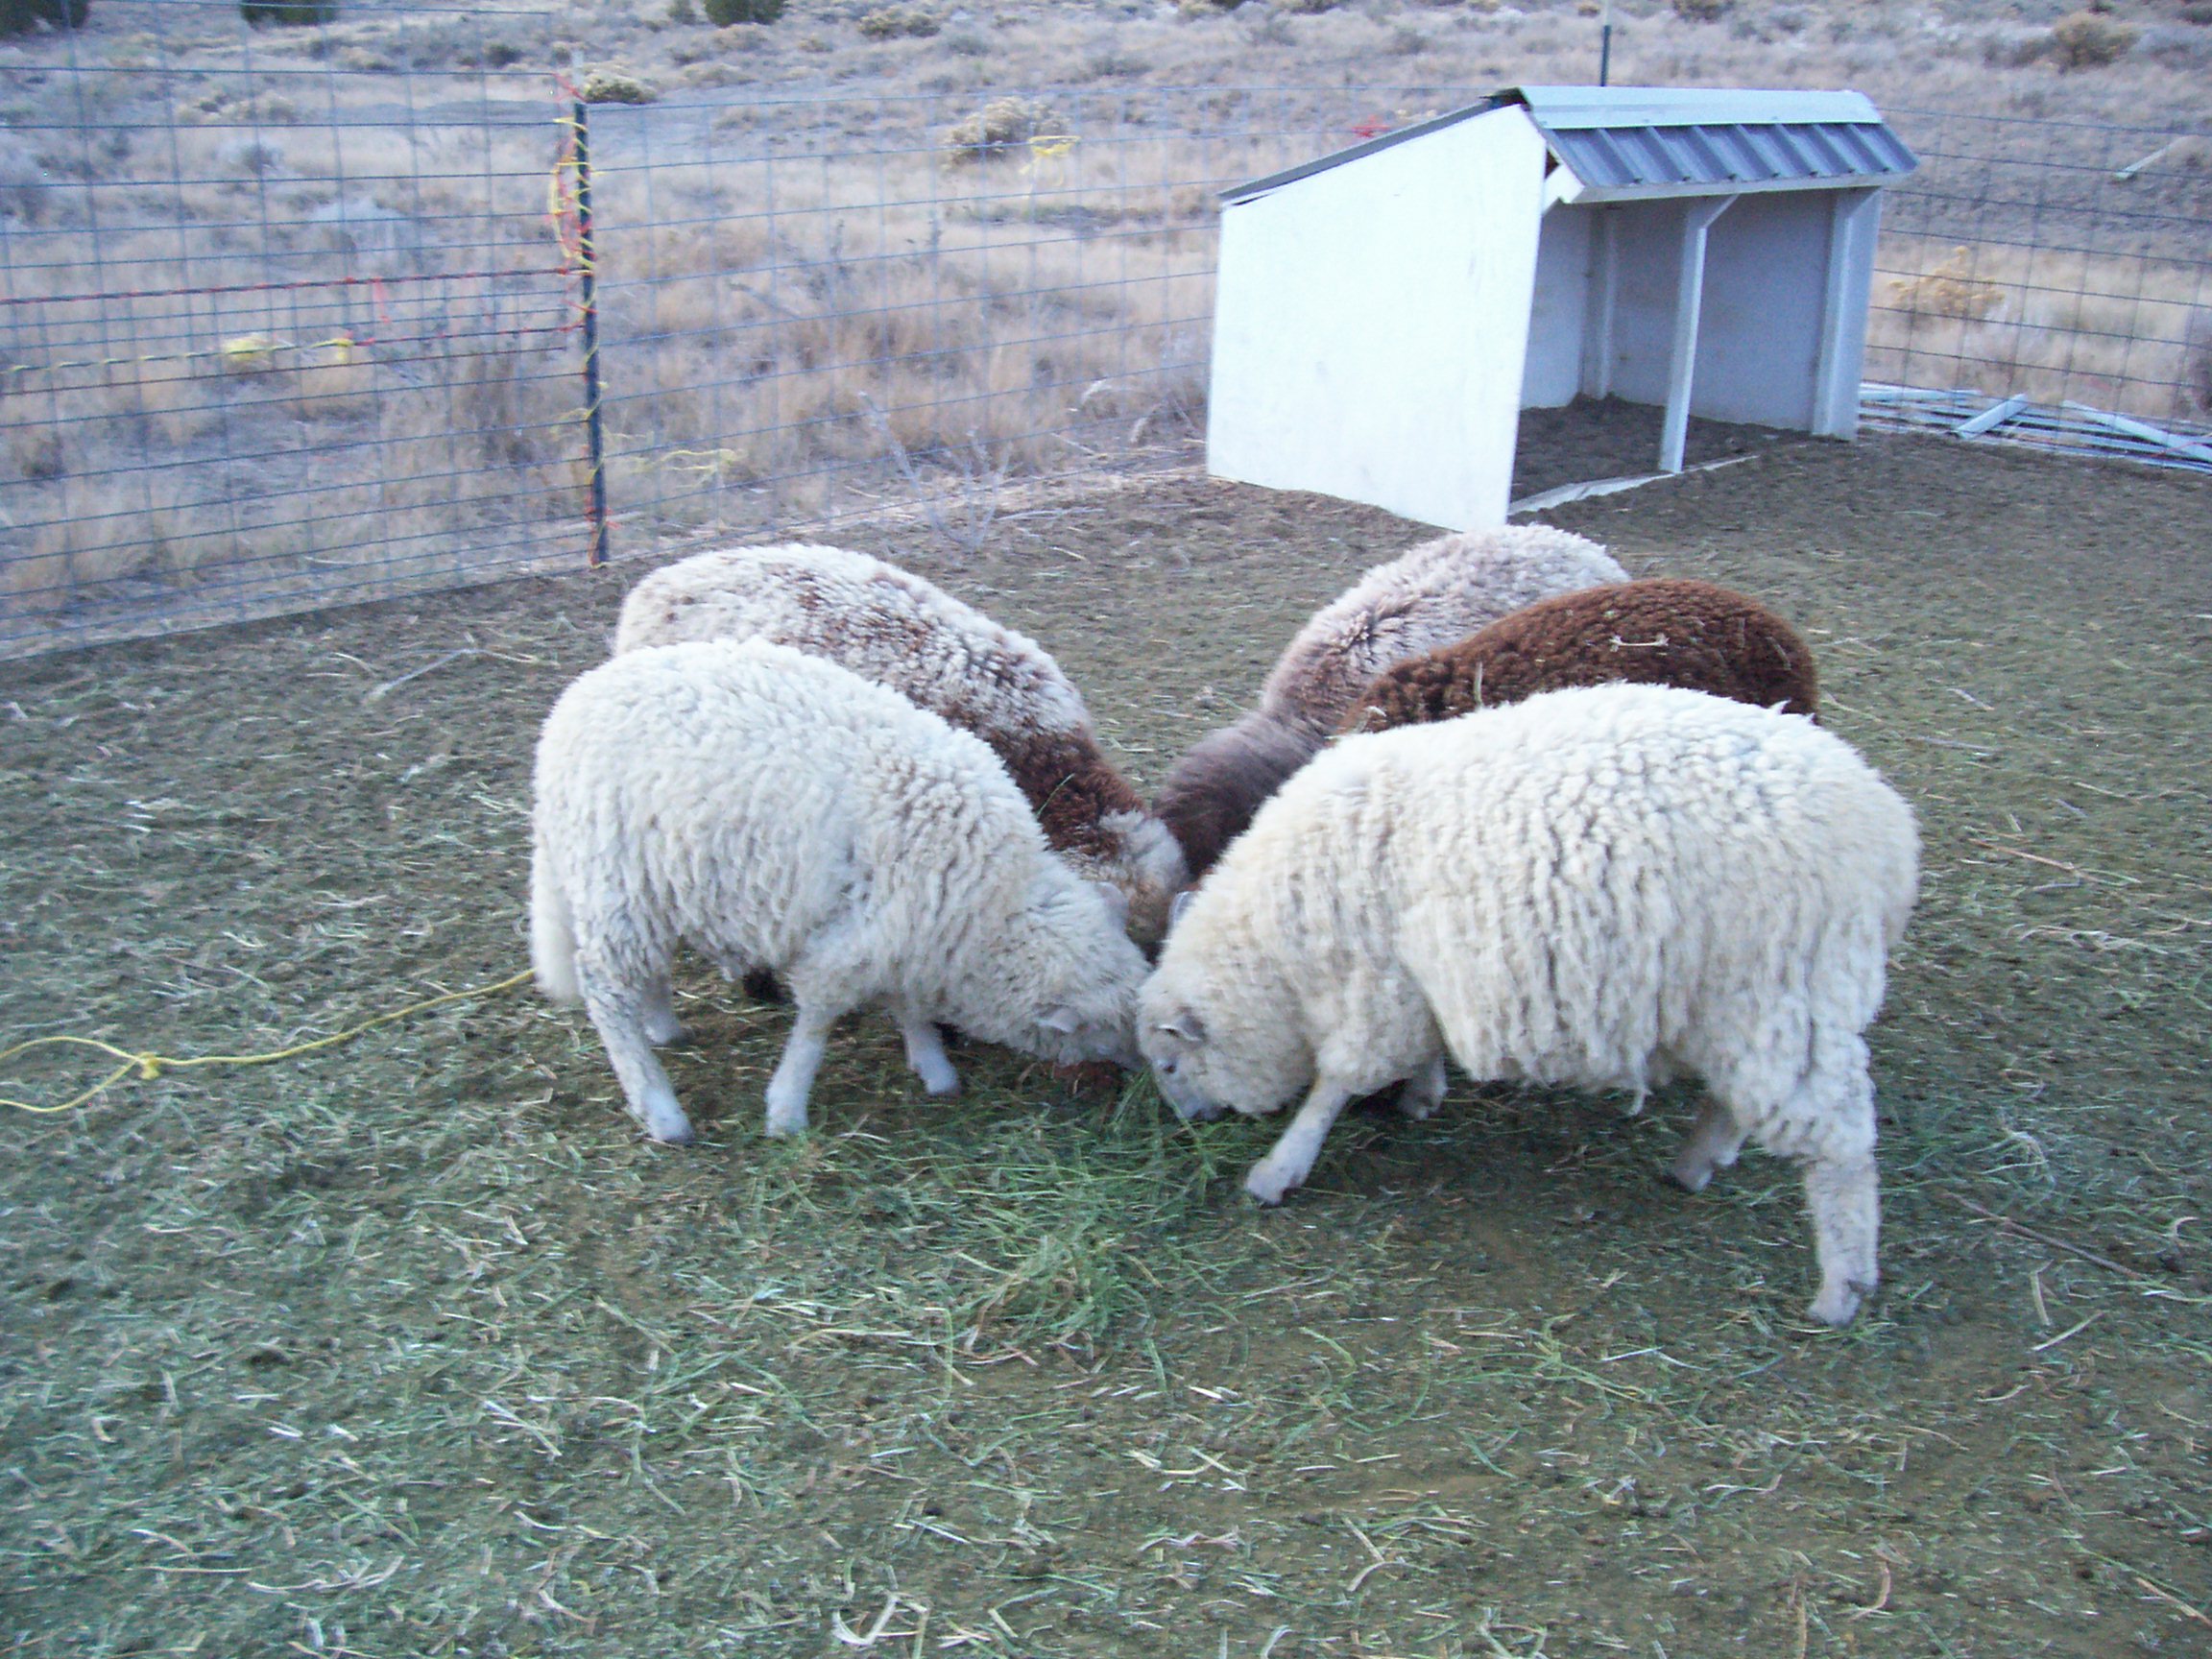
There are a lot more spinners than there are spinners who raise their own sheep, but since I had my own handspinner’s flock for 13 years I can’t make Step 1 be anything but… raising and shearing the sheep!
Most breeds of sheep are bred in the fall for spring lambs. The timing of this partly depends on the climate, but also on the time of year the rancher wants to have lambs. If they plan on showing at local fairs, for instance, they time the birth of the lambs for maximum growth by show time.
Shearing happens in the fall before the weather gets too cold for the freshly naked animals. With handspinner’s flocks, which is a small flock where special care is taken for beautiful, clean wool) the sheep are often covered with canvas jackets immediately after shearing. They look like a kid wearing his dad’s shirt at this stage, but will look like baked potatoes once their fleeces grow in under the jacket. This covering prevents any dust or debris from sticking to the freshly shorn sheep, so the fleece will be clean from base to tip. With large commercial productions, the sheep are not covered, are quite dirty, and fleeces generally are gathered and manhandled into large bags and taken to a co-op to be pooled together with wool from other sources. The wool then is taken to a mill for processing, including a chemical bath in hydrochloric acid which leaves it brittle and harsh. Just another reason to look for small businesses and local wool by attending Fiber Festivals!
Wool intended for the handspinners’ market or to be sold locally is treated with tender loving care. It is shorn from the sheep carefully in a whole blanket, and kept separate from other wool. As each fleece is shorn from the sheep, it is placed on a “skirting table,” spread out, and the low-quality belly wool and any dung tags from around the legs and tail area are removed. The fleece is bagged, and ready for a handspinner!
A properly shorn fleece will stick together and, when unrolled, will look like a blanket of wool shaped like a sheep. The neck, legs, and tail are easily recognizable. Shearers with the skill to do this are becoming rare, however, and many ranchers shear their own sheep for lack of a professional shearer nearby. If they are very careful, the quality of the fleece is just as good as when a pro did the shearing, but it generally is not still in whole, blanket form When I sheared my sheep by hand I generally divided the fleece into quarters. One of the times I tried to preserve the whole fleece intact, the sheep got away from me and ran off, trailing the precious wool through straw and dung.
STEP 2. SORTING THE WOOL
When the spinner is ready to use their whole raw fleece, it is spread out again. This is when the spinner makes some decisions. The quality of the wool can vary with the area on the sheep. Back wool often is a little bit shorter than the sides, and may have more bits of leaves and dust that have fallen into the fleece. The dirt isn’t an issue with a covered fleece.
If the spinner wants to be very choosy about consistent quality of their yarn, they will be careful where the wool came from on the fleece. If they are going to mix shorter wool with longer, slightly coarser with finer, they need to have the qualities of wool evenly distributed for an even blending. If they choose to have the highest quality side wool be the only source for their yarn, then the back, neck, and thighs will be pulled away from the fleece at this point.
If this is a spotted or variegated fleece, the spinner can choose how to use the natural colors at this point, as well. A black and white spotted fleece can have the colors separated, or completely blended together for a muted tweed look. Controlled mixing of dark and light colors together can create a continuous grade of color shade. This can be used in very creative ways with knitting or weaving.
STEP 3. WASHING THE FLEECE
After sorting the wool, it can be washed. Fleece that is spun without washing is said to be “spun in the grease.” All of the natural lanolin is still present in the wool, creating a greasy feel. This will be mostly washed out once the yarn is spun, If treated gently during the wash, enough of the lanolin is still in the wool to keep it soft, but not so much as to leave it feeling sticky or greasy.
Washing the fleece, sometimes known as “scouring,” is a tricky process. There must not be any agitation of the fleece during the washing, or it will felt. Very hot water is necessary to get the fleece clean. It must be rinsed several times, until the rinse water runs clear. When it is clean, it should be “wuzzed.” This charming old term means to have the water thrown out of it. The spin cycle on the washing machine does this very nicely. Just be certain that there is never any agitation going on with wool in the washer. The much-lighter, much-cleaner fleece is removed from the washer and set out in a warm place to finish drying.
STEP 4. PICKING AND TEASING THE WOOL
The cleaned fleece is now ready to tease. This is where the spinner picks at the fleece, making sharp jerking motions to fluff up the fibers. Take care not to damage the fibers with too much yanking, but quick movements clean out more dirt and debris that has been hiding in the fleece, shooting them loose of the wool. There are tools that can be used for this process, called “Pickers.” They’re fairly dangerous beasts, so not a tool to have if there are going to be kids around, and hands will do the job just fine.
STEP 5: CARDING or COMBING THE WOOL
Either using hand cards or a drum carder, the fleece is prepared in its final step before spinning. There are other methods of preparing the fiber at this step, but I’m describing a “woolen” yarn, (as opposed to worsted, which is from combed fibers all parallel to each other.) Cards are made from a wire “cloth,” which is covered with little angled wires sticking out. The common slicker brush that you can find in pet stores or the pet aisle of the grocery store meant for grooming dogs or cats is made from the same type of wire cloth.
The fluffy teased wool from Step 4 is run through the cards resulting in a controlled tangle where most of the fibers are running the same direction, but criss-crossed and fluffy. This airy preparation is called a “batt” when it comes from the drum carder, or a “rolag” when made on hand cards. Many of the terms for spinning are from Old English or Old Norse. (I was in a yarn shop in Germany once, and the shop keeper didn’t know English, and I didn’t know German. As soon as we started talking knitting, though, it was the same language!)

 STEP 6 SPINNING THE YARN
Now that we have our rolags or batts, it’s time to spin! You go go really primitive if you would like, and just roll the fibers down your thigh. That is almost certainly how the original handspinners did their thing. We can take advantage of some considerable advancement in spinning tools, however, without giving up the handmade quality of our handspun yarn. Drop spindles or spinning wheels are definitely a better choice for making a quality yarn.
Drop spindles are a great little portable tool for spinning. They’ve been around for thousands of years. The Egyptians left us some great pictures of people spinning on a drop spindle.
For a fabulous video on spindle spinning, check out this video from Long Thread Media.
The spinning wheel wasn’t invented until much later. Our commercial yarns are now spun on the Spinning Jenny and her slightly more modern cousins. The control over quality, texture, color, and fibers were forfeited in a trade off for speed when the Industrial Revolution came along with factory-spun yarns. The handspinner can take back that control, and truly turn spinning yarn into an art-form.
The spinning process involves drafting out a controlled amount of fiber from the rolag and introducing twist into it. The twist becomes set into the fibers, holding the together in a continuous strand. This thread is known as “singles.” It is possible to knit, crochet, or weave with a singles, but it tends to pull the work into a slight angle because the twist in the yarn only goes one direction and pulls that way. When two or more singles have been plied back on each other, the twist becomes balanced– a little pull one way, a little pull the other way, means no pull at all on the finished fabric.
STEP 7. PLYING
To make that balanced yarn, two or more bobbins full of singles from the wheel, or cones of singles from the drop spindle are placed in some form of holder to prevent their getting tangled. The ends of the yarn are pulled into the spinning wheel to start a new bobbin full of plied yarn. The wheel or spindle is turned in the opposite direction of the original twist.

STEP 8 SETTING THE TWIST
We aren’t done yet! After spinning and plying, the yarn has to be wound into a skein and be set with a light washing and a little bit of stretching. Pulling wet yarn taught will dry it with no elasticity, which is ok for weaving, but undesirable for knitting. When the yarn has dried, the twist is set in the fibers and won’t pull or stretch unevenly in the finished project.
After that, it’s time to use your beautiful yarn!
Comments are always welcome here at SlowYarn! Tell us what you think, share your ideas, or comment on the content. Or you can contact me directly at Kelley@SlowYarn.com.
Thanks!
–Kelley
Copyright © 2015-2023 Kelley Adams. All rights reserved.
All text, photos, and graphics are the property of Kelley Adams, unless credit is given to an alternative source.