
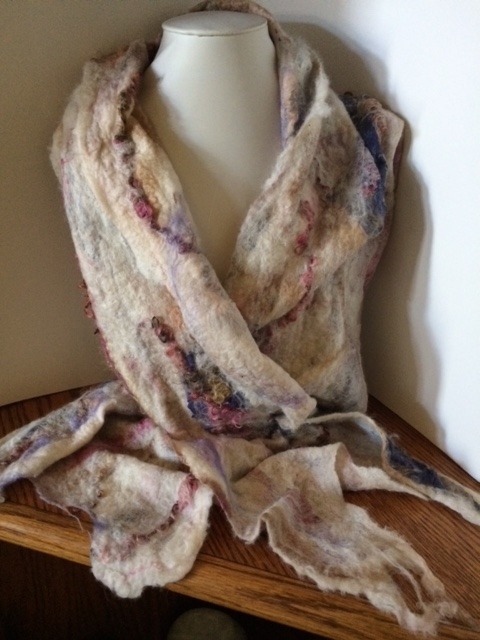
“Twenties” Nuno Felt Scarf
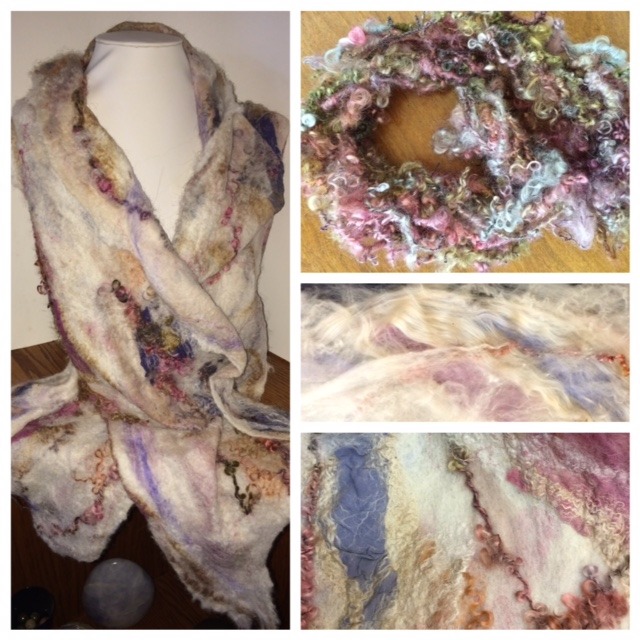
Let’s make a nuno felt scarf!
The Silk
When my daughter moved out of state, she couldn’t take everything with her. She talked me into keeping a box of silk garments she’d rescued from thrift stores over the years. (Twist my arm!) Although she has similar tastes to mine, meaning anything green, these garments were purchased solely for the natural fibers and not for the colors. There were some old silk shirts from the 90s which were definitely not in my usual color palette!
The Mohair
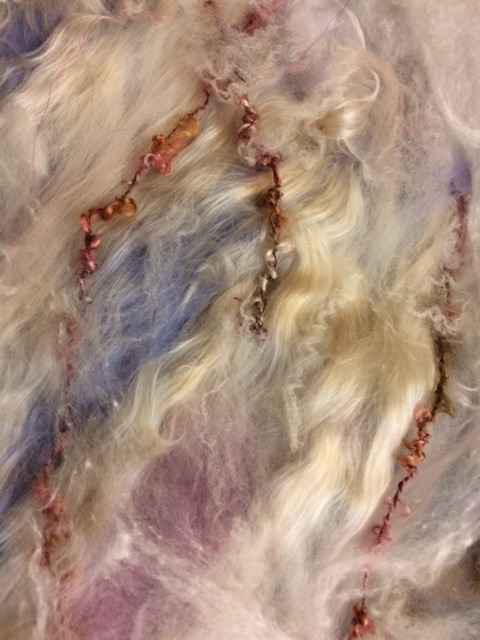
I had a bag of mixed colors of mohair locks, purchased from the Salida Fiber Festival a couple of weeks ago, and this old-fashioned color grouping kept calling my name. They struck me as very old-fashioned colors, reminiscent of the 1920s. I spun up a skein of mohair boucle yarn, using the technique I demonstrate on this video but with a wool core instead of slick silk.
Because the core was not slick, the locks were more drawn out than the yarn from the video. The idea was mostly to tie the ends to a core yarn to make them felt better. You can see in my previous blog post, Fibers Under a Microscope, that mohair is pretty stiff and slick. It tends to pop right out of a felted fabric, whereas slick silk fibers conform and allow themselves to be bonded by the wool really easily.
Here is the yarn after spinning. I did not set the twist. I wanted it to kink up and have lots of texture and character on the surface of the felt. 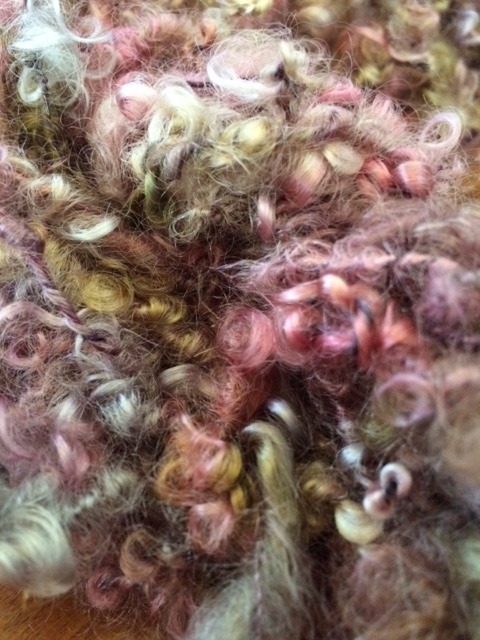
The “Ingredients”
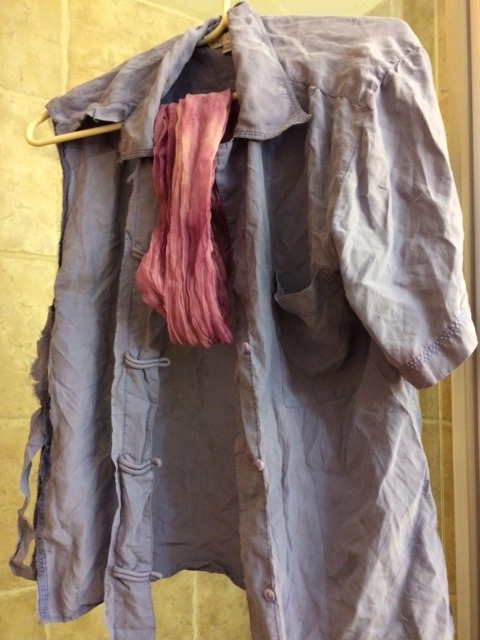
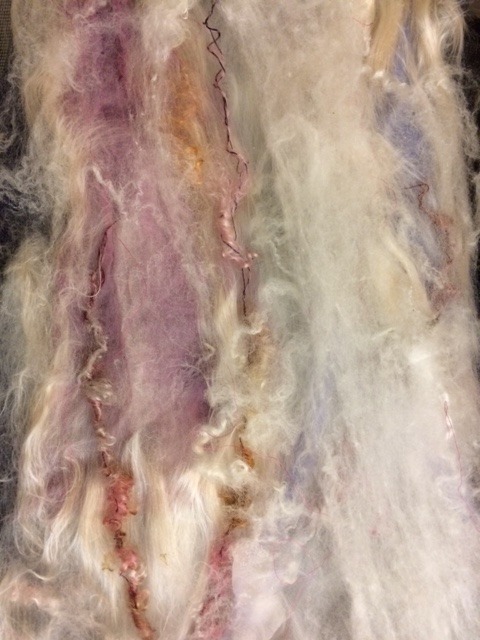
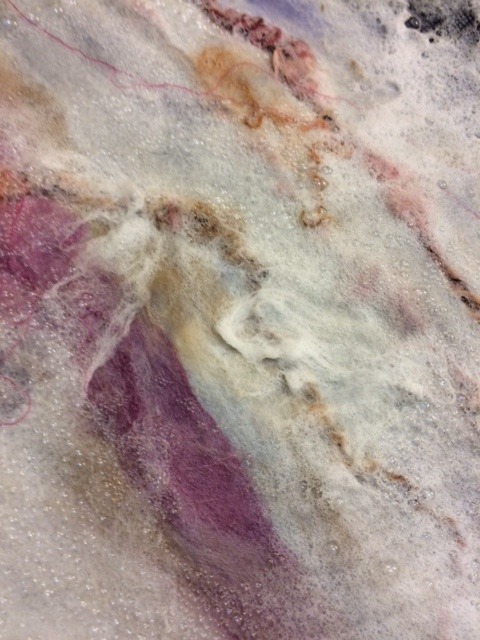
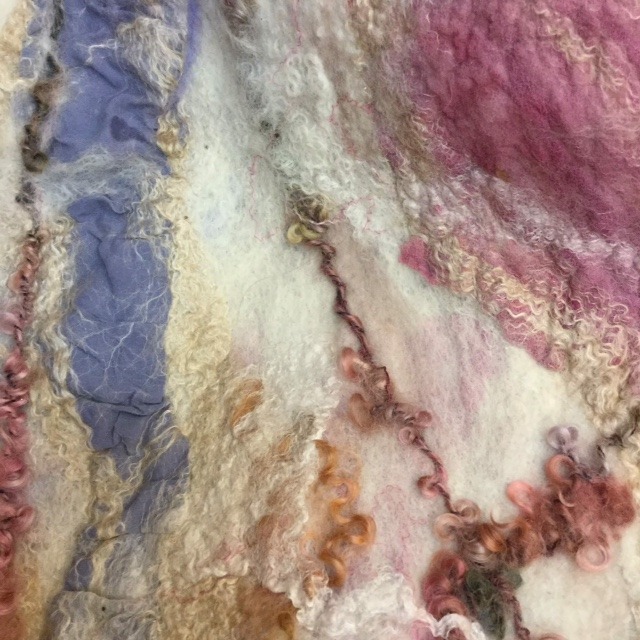
Here are some of the other “ingredients” for the scarf. The lavender shirt is sueded silk. Someone took out the impressive Mork and Mindy 80’s shoulder pads, which meant it didn’t fit anybody and ended up in the thrift store. I ripped off a sleeve, feeling only mildly guilty about it, and cut it into more organic shapes for adding to the felt. I don’t really do straight lines in any of my artwork, so I couldn’t rip it into strips. The pink in the middle is a bit of silk gauze dyed a rosy color. Who knows why or when. These things just happen in my house.
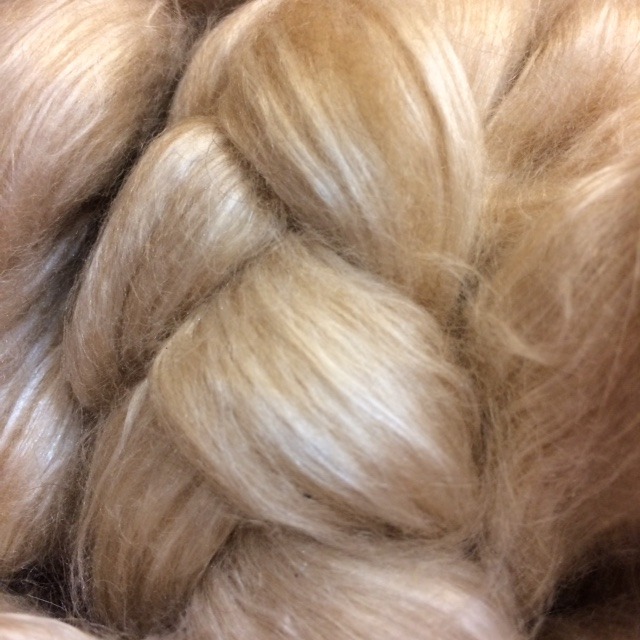
The silk/camel down blend needs no further description. You can just SEE how soft it is!
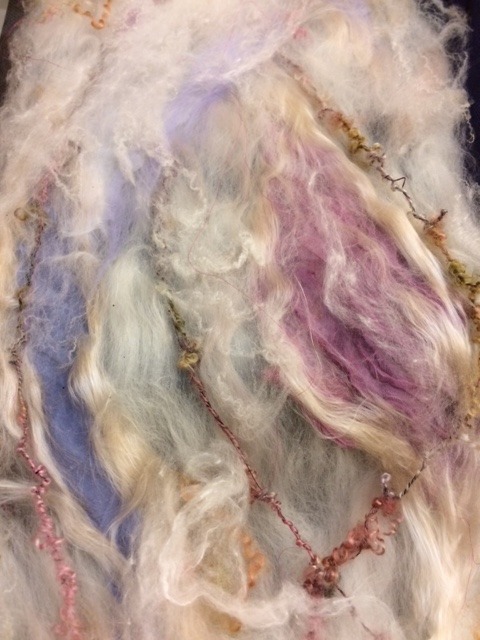
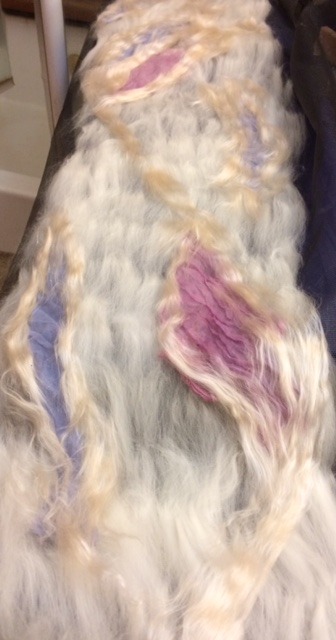
Layering the Fibers
Here, you can see how the fibers are laid out in layers, with wool or camel down carefully placed along the edges of the fabric to bind it to the underlayer of Merino. The yarn, also, has wool laid out across it here and there to ensure that it doesn’t escape.
 .
. 
Let the Felting Begin!
When I’m happy with the composition, it’s ready to get felting!
Use a Screen or Net
With any felt including silk or with a careful composition, I always cover it with a screen before wetting. I use discount bin window screen. It’s usually fiberglass but I prefer nylon if I can get it. I’ve never gotten slivers in my hands from this form of fiberglass, but I worry because I’ve been stabbed by the little fibers from other fiberglass sources. I use it for felting and for silk fusion projects. Window screen is heavy and durable, and presses the fibers right down to hold them in place while you get them thoroughly wet and soapy.
You can see that I’m using a dark, fiberglass mesh on mine. 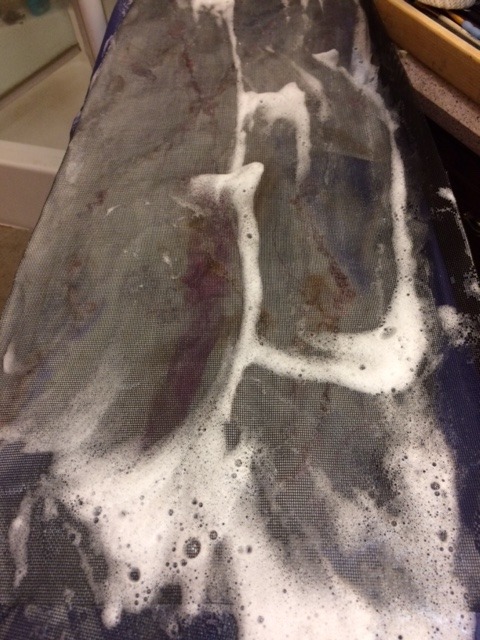
Starting the Felt
After it has mashed down and is soaked through, I rub my hand across the surface, feeling for places with friction, and I add more soap to those spots. Soap changes the ph of the wool, allowing it to felt as well as lubricating the surface so it can be rubbed without displacing the fibers.
More Power!
For larger projects I add a step here before removing the window screen. I break out the power tools! (I am VERY careful to keep the motor from getting wet, and you should be, too, please! Electrocution is bad.) The vibrating sander is the secret weapon which shortens agitation time drastically!
Cover your screen with a generous amount of bubble wrap, bubble side down onto the mesh. Then use a finish sander (the vibrating kind and NOT the belt kind!) over the bubble wrap.
Caution: As well as avoiding electrocution from using a power tool on a wet project, the bubble wrap keeps the velcro hooks that are often on the bottom of the sanding pad from hooking your fibers and pulling them out through the screen! Use bubble wrap between the sander and the screen and wet fiber!
Place it over all areas of the felt and let it sit and vibrate in place for 60 seconds. You may have to replace the bubble wrap, because the bubbles deflate sometimes during this process. You don’t have to press down! Think of those little bubbles as fingers, gently agitating the surface of your felt with every vibration.
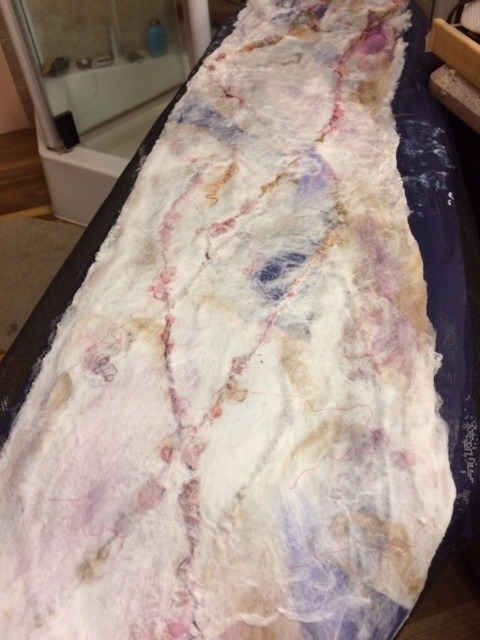
Remove the Screen
I can now gently pull back the screen without disturbing the carefully placed fibers. The surface is pretty well felted after the sander did its job, and even the core of the felt is beginning to bond.
Rolling…and rolling…and rolling…
Flip the whole thing over, and roll it up into more bubble wrap. You’ll need to roll this back and forth for awhile, putting pressure on the roll with your palms. If you did not use the sander, you should roll your felt piece about 400 times. Re-arrange the felt every 100 rolls or so to felt both ends of the scarf evenly, with the other end of the scarf in the center of your roll. Using the sander speeds the process, and you won’t need to roll the felt back and forth so many times.
Check Your Progress
Each time you re-roll, check the surface of your project. Are the fibers still pulling up with every little rub? If they’re sticking, you’re ready for some more action-packed violence with that scarf!
Wad and Slap
You are going to wad up your precious soft-felted scarf into a wet, soapy ball, and throw it — hard– against a table. Pick it up and re-wad it (is that even a word?) and then throw it again! Do this about 20 times. (It’s funny to explain to the neighbors what I’m doing when I slam wet felt out on the patio table. It’s even funnier not to explain.)
Hardening the Felt With a Washboard
The last step in the felting process, to make this a durable fabric as well as pretty, is to agitate over a rough surface or washboard. Some people use a waffle-surfaced felting tool. I prefer an inexpensive little washboard basin I picked up off AliExpress. I got it last spring, and it has become my go-to tool for all kinds of fiber projects.
Roll, fold, or tuck your scarf so that you can roll it down the little washboard ramp.
- The wool will shrink in the direction you are rolling.
- If your scarf is too wide at one end, roll it lengthwise and then rub only the end that’s wide, rolling it down the washboard.
- Undo and check it, then re-roll with the other side inside the roll and work it some more.
- If your scarf is too long, roll the whole thing end to end and roll.
- You can control the shrinkage in this way to get it into the shape you want. I love organic edges, so I don’t even try to make those straight, but I don’t want really wide spots on a scarf.
You Have Felt!
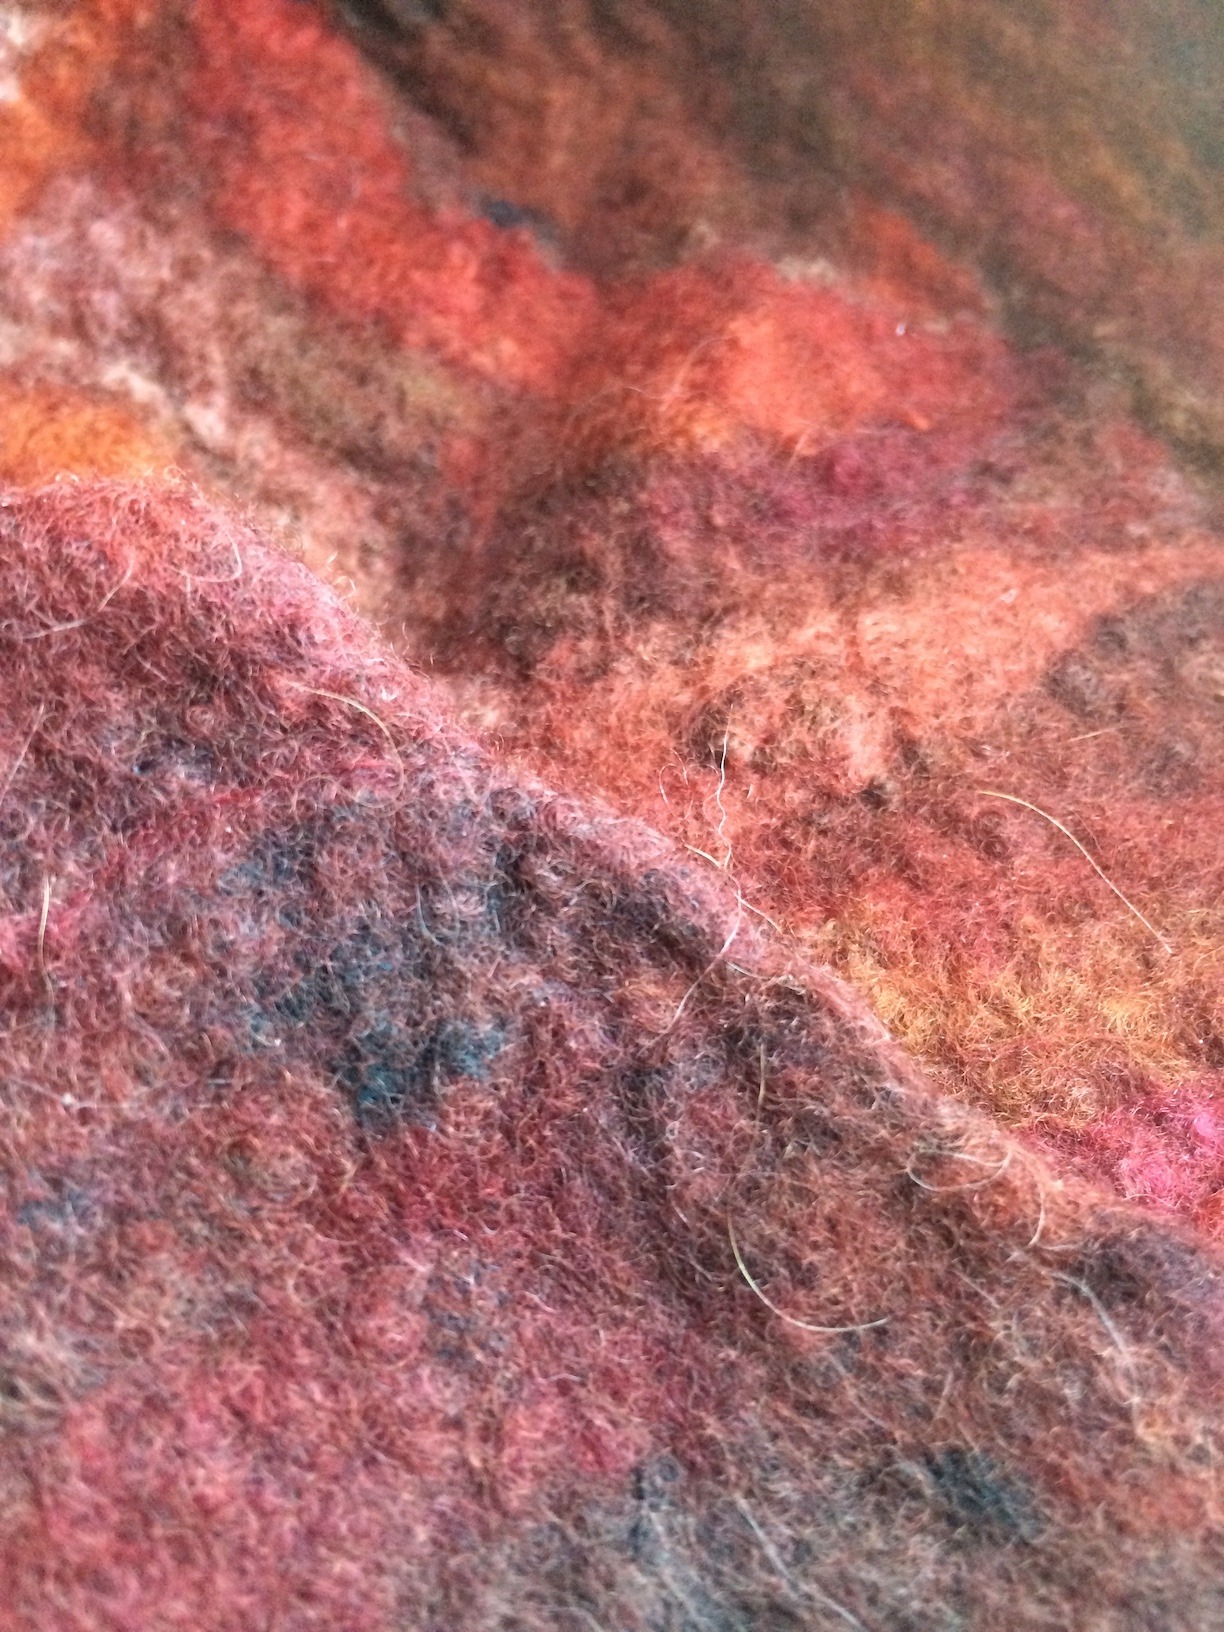
When you have hard-felted (all the violent parts) your felt, the surface will show the puckery texture that you’re looking for. This is a durable fabric, and, short of cat claws picking at it, shouldn’t have bits falling off or pilling over time.
Rinse Your Felt
After you have finished with the felting, rinse your scarf well with hot water. When you aren’t seeing any suds anymore, make a final rinse with some vinegar in your rinse water. I use about a half a cup of plain white vinegar in my hot rinse water, and swish the scarf in it for a minute or two. Soap is alkaline, which can damage protein fibers. Vinegar will remove any traces of soap, and neutralize the pH of your felt. The vinegar odor disappears, but you may want to rinse it out with plain water.
Comments are always welcome here at SlowYarn! Tell us what you think, share your ideas, or comment on the content. Or you can contact me directly at Kelley@SlowYarn.com.
Thanks!
–Kelley
Copyright © 2018 -2023- Kelley Adams. All rights reserved.
All text, photos, and graphics are the property of Kelley Adams.


Wow…what an impressive project…equal parts, science, art, and romance. That really is a stunning scarf…and one of a kind.
Love how you re-purpose and re-use items. In a disposable society it makes me happy when someone salvages something that was once loved and can make something new again to be appreciated all over again.
Thanks for thinking outside of the box! Love your site and this post!
Thank you so much, Tim! And you’re absolutely right about the science, art, and romance. I feel like a mad scientist in his lab sometimes as I mix ingredients for a fiber art concoction like this one.
–Kelley
Wow, what a neat process! I have only done felting by accident, by washing a wool hat in the washing machine and then drying it when I was a teen. 😀 This looks much better than my unpleasant oops. I love the strands of mohair yarn throughout and the silk base. It looks so good when you’re done.
Thank you! Feltmakers claim that theirs is the oldest form of fabric making. I think that’s just a guess, because it happens so often by accident that it’s easy to imagine a caveman accidentally felting some animal fur he stuffed into his sandals.
Hi Kelly,
that is a true masterpiece which looks like the twenties. Interesting how worked through it to get the final result.
As I read through your article and looked at the images, I was not impressed at all, but the final product looks so good and so old fashioned. I can imagine how beautiful my grandmother would have looked in it.
Thanks,
Oscar
Thanks, Oscar! I agree– felt just looks like a mess when it’s first laid out. Magic happens when it all “glues” together!
I must say that you are very talented. Very good job! I like to see that kind of people who have that imagination because those people are somehow very special. I will share this post for sure and forward it to my mom who also like to do this. Thank you for such creative article!
Thank you, Daniel! I love to hear when people appreciate my strange, obsolete skills because they just don’t look that impressive on a job resume. 😉
Hello Kelly,
Stunning results and quite the process. I couldn’t help but think, as I watched your video, that the spinning process would take some time to master. Your instruction is very thorough, but I’m going to imagine some trail and error. Did you find that you went through a good deal of material before you became proficient? I’m hoping that the process is more intuitive than it looks to me. I look forward to hearing your response.
For some people, Glenn, spinning is a really intuitive process from the beginning. For most, it makes them feel like they need at least three more hands to get the job done. I have taught spinning for years, and have found that a good spinning teacher must be able to explain the magic as well as the math. It’s really a matter of how many fibers enter the yarn and how many twists hold it together, but for most people the key to learning is to pay attention to how it feels going through their fingers instead of counting and measuring.
Can’t say I’m at all knowledgeable on these topics, therefore I honestly admire your expertise. Following through and witnessing what you put out in this post was both an educational and intriguing experience, learned a bit here and there and was drawn in to the process even though I myself didn’t quite completely understand it. Though at the end, I really fancied how that scarf was looking! Simply put, a great post.
One of my goals for SlowYarn.com is to provide answers to questions for such total beginners that they don’t even know what to ask! Thank you for your comment. It makes me realize that I should write a total beginner page for felting to explain the crazy process behind it. It’s actually science, even though it feels like magic while you’re doing it.